In the last section, you got Introduced to Python. Now its time to get this powerful program installed on to your machine and begin the magic. As you are already aware (in case you are not) that Python is open-source software available at no cost and can be used to develop the application in many areas. Trust me, it will not take more than 10 minutes to install and configure python. Just remember,
Table of Contents
- Downloading correct Python Binary
- Installing Python on your machine
- Configuring Python on windows environment
- Invoke Python interpreter for the first time
- What is PIP?
- Common Python PIP command
Downloading correct Python Binary
As you know, Python is open-source software and Installer can be downloaded from the official website for absolutely free. From the home page of official website navigate to the downloads section and then there are two options for the user either choose the latest python version (released version at that particular time) or a custom release.
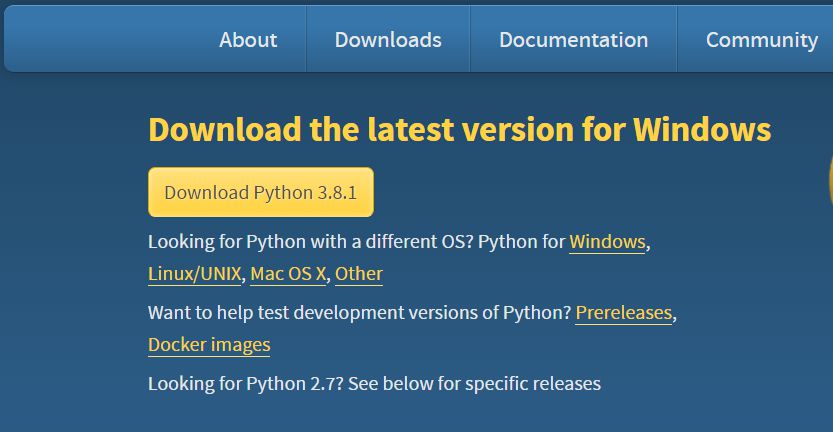
The latest released version of Python is highlighted with the yellow button (version mentioned on it) and can be downloaded by just clicking over it. Now, if you are interested to get the custom version then choose the platform (basically OS), this will take you to the landing page and then navigate to the version you want to download. With every version, you will see various download options as shown below in the image (windows OS is selected for this demonstration).
Each option mentioned in the image above is applicable for a specific plan. For instance, Windows x86-64 executable installer is for downloading the complete binary on the PC and then it can be installed without the internet connection, while Windows x86-64 web-based installer is useful to install Python using an internet connection (initially an installer package will be downloaded and the remaining parts are extracted from the web-server location during rest of the installation process). I would prefer Windows x86-64 executable installer based installation method as it downloads the complete setup in one ago.
Choose an appropriate option based on your system architecture 64bit (x64) or 32bit(x86) and click on it. Choosing an appropriate binary version (with correct architecture) will eliminate unnecessary mess during custom package installation at later stages.
Personal experience: I had to struggle a lot in the past just because of choosing incorrect architecture. I still remember, I was trying to install Pytorch and was facing this issue “an unexpected error occurred while installing python package- Please choose the correct version”. After a lot of googling (literally) I finally arrived at this solution and had wasted a lot of time as well as effort. Hopefully, you will get benefits from my experiences.
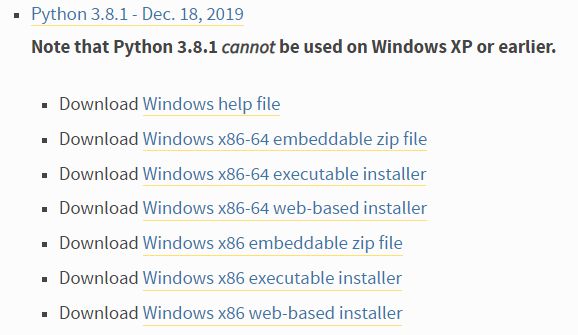
Find the link to the latest Python release for various Operating system.
Installing Python on your machine
Using the previous section, you can download Python Installer from the Python official website. Detailed guideline to install Python for most common platforms are discussed below in the respective section.
Install Python on Windows
Just for your information, Python does not come pre-shipped with window OS. After downloading the installer from python official website, just double click and run the installer. You will see a similar window shown below.
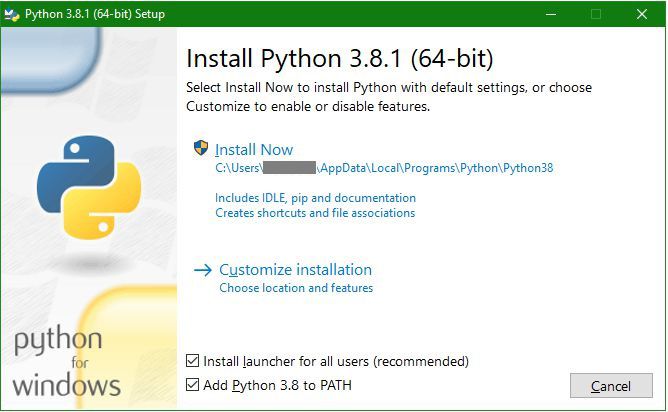
Make sure to put the tick mark on both the checkbox that says Install launcher for all users and Add Python 3.x to PATH as shown above to ensure that the interpreter will be placed in your execution path.
There are two installation option available on Installation Window, which are
- Install Now
- Customize Installation
Install now option will install Python in the default directory, which is, C:\users\username\AppData\Local\Programs\Python\Python_version as well as includes all necessary elements such as Python IDLE, pip, documentation etc… This is perhaps the best to install Python for beginners.
YouTube Video – Install Python on windows
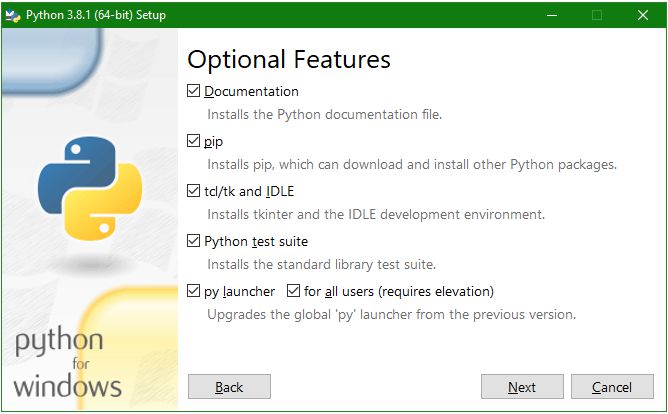
2nd Method which is, Customize Installation, is well suited for a little experienced user (beginners can also opt) although the process is pretty simple. This method provides users to choose a custom location for installation. As this will help users to manage multiple versions of python as well as a fixed location to keep python related stuff (which is, of course, easy to remember). After clicking on Customize Installation option, the following dialogue window will open with heading as “Optional Features“. Put a tick mark on all the checkboxes available on this dialogue and click on Next button.
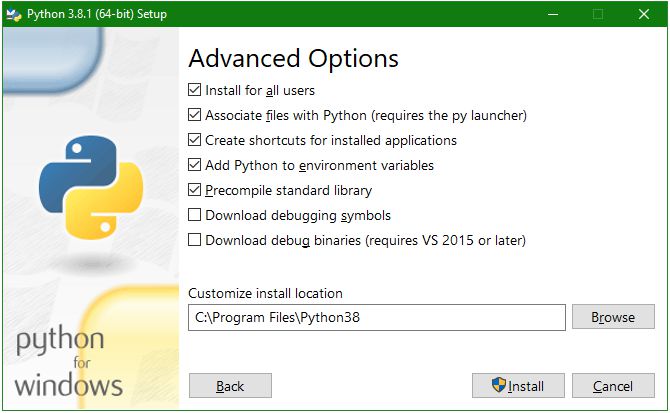
You will find the next window with heading as “Advanced Options” and looks like the image shown below. You can choose from the option available via a checkbox and click on corresponding box/boxes. Mostly programmers select options that are shown in the above image. In the customization install directory section, choose the desired path to install python. Use the browse button to navigate and select a path on the window and finally click on the Install button to proceed with the installation.
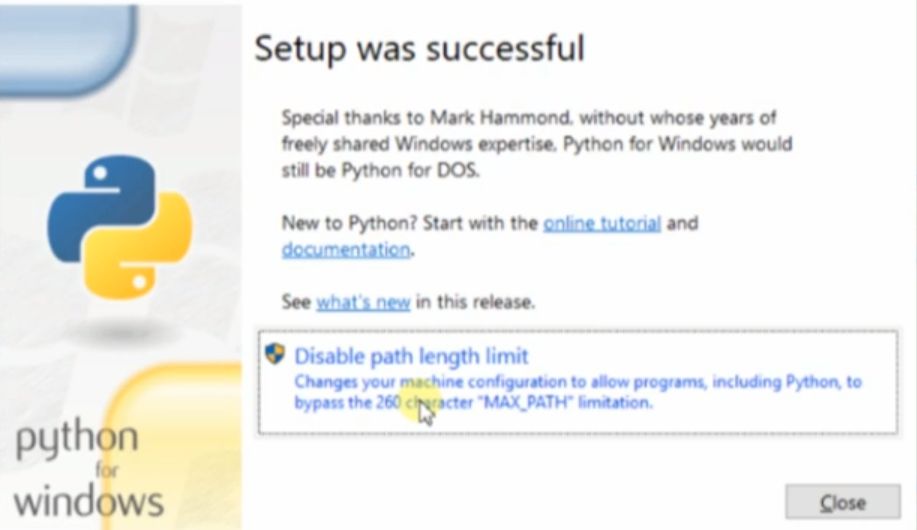
Follow the general instructions appearing on the installer and make your selection accordingly. After 1 or 2 minutes you will see a window, final part of the installation, titled “Setup was successful”. You will notice that inside this window there is one action item saying Disable path length limit. Click on it to disable windows path limit restriction for Python. This will allow using a path structure of any character length, which otherwise, would not be possible.
Hey! Congratulations you have installed Python on your machine.
Verify installation on Windows OS
To verify successful installation of Python on Windows OS, you can type a command on command prompt window. Open windows command prompt by pressing window+R button, write cmd and hit enter. Write the following command on the prompt.
python --versionYou will get a response stating the current version of Python installed on your system.
In case you don’t see Python version or encounter any error statement in the command prompt windows then go to Configure section of this article.
Install Python on Mac
Earlier versions, till 10.14, MacOS used to come with Python 2.x preinstalled on it, however, starting with the MacOS 10.15 (released in Oct 2019) it does not come preinstalled. As you know, Python 2 is no longer officially supported so there is no point in continuing with the older version of Python.
The installation process of Python on Mac is similar to that on windows. You can follow the same steps to get the python installer for Mac as well from the official website, the only difference would be to select Mac OS X instead of Windows OS.
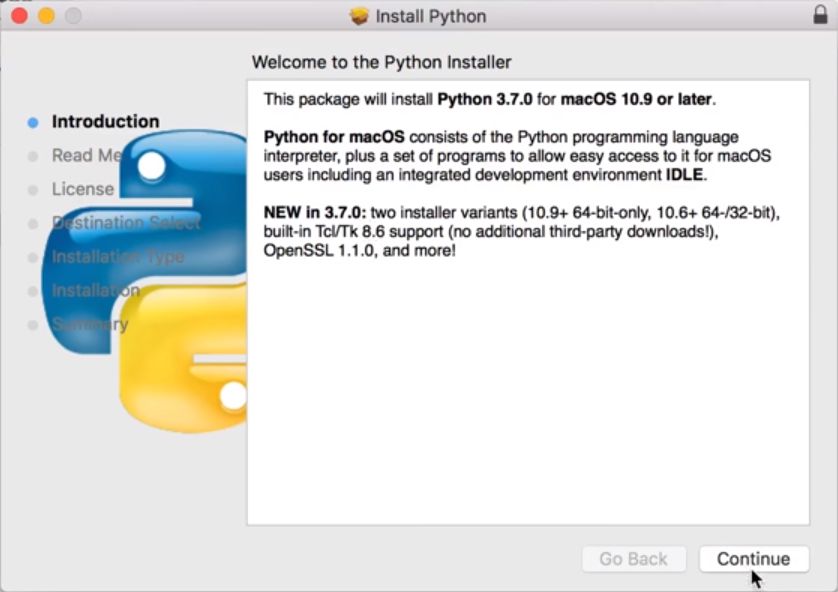
Once you have downloaded Python installer package with extension .pkg (it was .exe in case of Windows OS). Double click on the Installer and it will start the process by opening a new window saying “Welcome to Python installer” and you will see general information as shown in the image below. Click on the continue button to proceed to the next step.
Next, you will see another window titled “Important Information”, read through if you want, and then click on the continue button. Another window will appear titled as “Software License Agreement”, again click on the continue button, it will ask to agree with the Terms and conditions. Click on the agree button. After the agree button is clicked, it will show a new window titled “Select a destination”. Let it be as it is (I mean default setting) and click on the continue button. The screen looks similar to the image shown below.
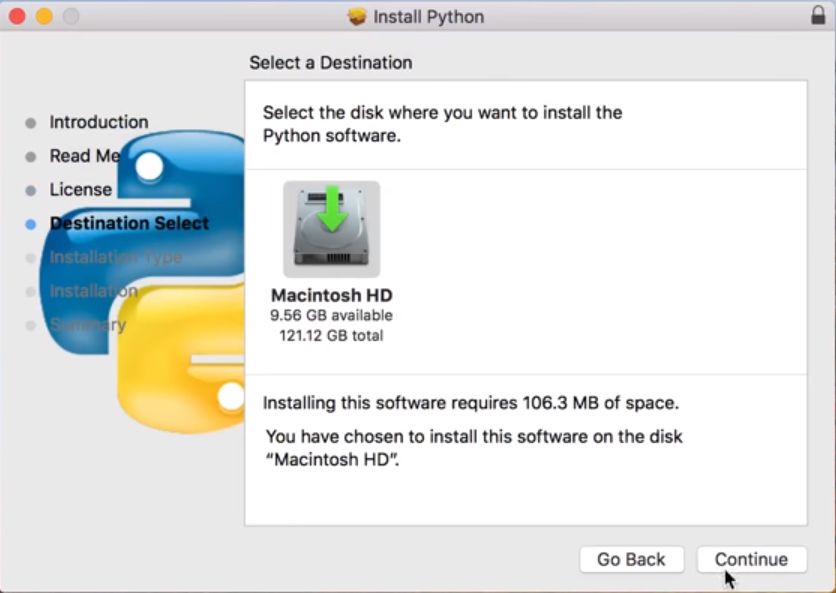
Next, you will see a window titled “Standard install on Macintosh HD” and it will also provide with the option to Change install location, but don’t change the location instead click on the install button to proceed ahead. It may ask you to provide user password, key in your password and select the install software button.
Finally, the installation process will start and will take merely 2-3 minutes to finalize the complete process.
Hey! Mac user, Congratulations – You got the powerful language installed on your machine.
Verify installation on Mac OS
To verify successful installation of Python on Mac OS, we can run a command on the terminal. Open a terminal on Mac and type in the following command (whichever version you want to verify)
python --version    # to verify python 2 installation
python3 --version   # to verify python 3 installation
You will get a response stating the current version of Python installed on your system.
Install Python on Linux
Almost every Linux distributions, such as Fedora, Ubuntu, Kubuntu, SUSE, RHEL and many more, come preinstalled with Python. However, there could be version update missing. In this section, we will discuss how to install or update Python on Linux distribution. I am considering Ubuntu as a part of the demonstration but the same method should work well with all other Linux distributions as well. Python installation is fairly simple with Linux OS via the command line (trust me it is simplest of all other OS). It does not require any external download (in most cases).
Step1: Just open the Terminal on Ubuntu by pressing CTRL+ALT+T.
Step2: Type in below command and this will update all existing components
$ sudo apt-get updateStep3: Type in the following command to upgrade the system (if you want the latest version of ubuntu). This takes relatively more time depending on your current version.
$ sudo apt-get upgrade
$ sudo apt-get -y upgrade
The -y flag will confirm that we are agreeing for all items to be installed, but depending on your version of Linux, you may need to confirm additional prompts as your system updates and upgrades.
Step 4: Finally, type in the following command to install Python
$ sudo apt-get install python3 # to install python 3It will take a while and python will be installed on your system.
Hey! Linuxian, Congratulations – You got the powerful language installed on your machine.
Verify installation on Linux
To verify successful installation of Python on Linux OS, we can run a command on the terminal.
$ python3It will enter into Python interpreter mode and you can start working in that interactive environment.
Configuring Python on windows environment
Normally, after python installation on windows, it gets detected via command prompt. Incase Python is not getting detected in the command prompt and it throws some error like “unknown command” then follow the following section to troubleshoot python installation on windows.
Step1: Navigate to the system (Control Panel\System and Security\System) and click on Advanced system settings from the left bar. A system properties window will appear then click on Environment variables. Advance system settings windows look similar to the image below.

Step2: In User-variable section click on the Path and check if Python installation location, such as C:\Python38\ and C:\Python38\Scripts\, are available. In your case, Python installation location and version can be different or same. If it is not available then click on the new button from the right bar and add those locations. You are good to go now. Some times you may need to restart your system to accommodate the changes made.
Step3: Nothing !! You are done. Just go ahead a conquer the world.
Invoke Python interpreter for the first time
Hello, your system has now equipped with one of the most general-purpose powerful programming languages. On windows, open command prompt by pressing windows+R button, write cmd and hit enter.
Type python in the command prompt.
pythonYou are now into python interpreter which is indicated by the triple arrow (>>>). Type anything like
print ("Hello world")
Hello world
3+5
8
You have noticed that as soon as you type the expression and hit enter you get the results. This is because python is interactive.
What is PIP?
As of now, you have understood how to install Python, get into Python interpreter mode and start working with it. Python has many libraries, packages and modules that installed by default with a normal installation. But, Python is not limited to here. There are plenty of third-party libraries available for use with Python. Here comes the role of “PIP” to install those third party supported packages/library. PIP manages Python packages on your machine and it gets installed automatically during python installation. PIP is used to check the list of packages currently installed, add a new package and remove an existing package.
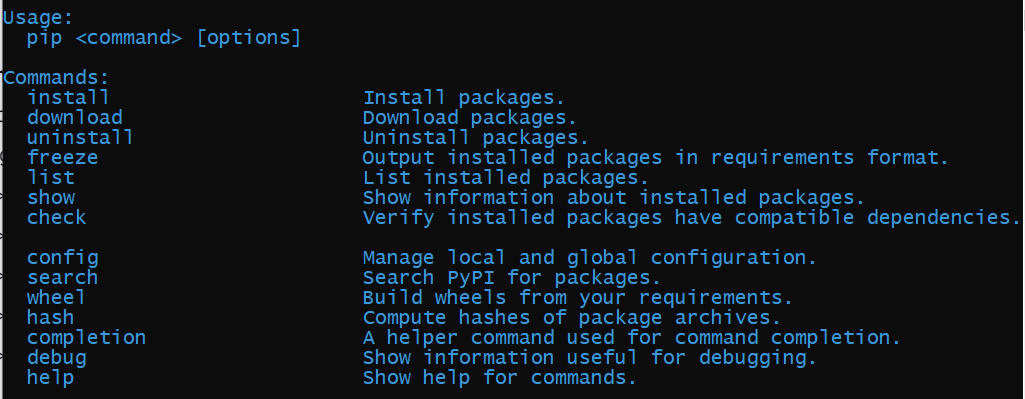
To use PIP open command prompt by pressing windows+R button, write cmd and hit enter. Write the following command and hit enter. It will show all the command and their description that can be used with pip.
pipTo upgrade the PIP use the following command
python -m pip install --upgrade pipCommon Python PIP command
Find below the list of common Python PIP command used very often by programmers.
pip --version  # to check the pip version
pip list       # to get the list of all installed packages
pip install    # to install any package
pip download   # to download a package
pip uninstall  # to uninstall an existing package
The complete list of pip command is shown in the image below

Hello! aipython, nice article. Well done
Very wonderful explanation with your simple languages. Do keep it up and really encouraging. At the same time, i would like to request on installation process through using anaconda. what differences are with the direct installation and using of anaconda? It’s benefits or advantages? Also like to request on Jupiter Notebook execution and its usages.
Lastly, very excellent lectures and really enjoyed it. Keep up and thumbs up here!
Yeshi from Bhutan
Hi Yeshi,
Thank you for your nice feedback. We will make sure to handle your request.
Just to let you know, we are working on Jupyter as well as Active state (Anaconda Distributions). But for beginners, we prefer (IDLE or Notepad++).
Thank you again !!
Keep Learning and Keep Growing !!